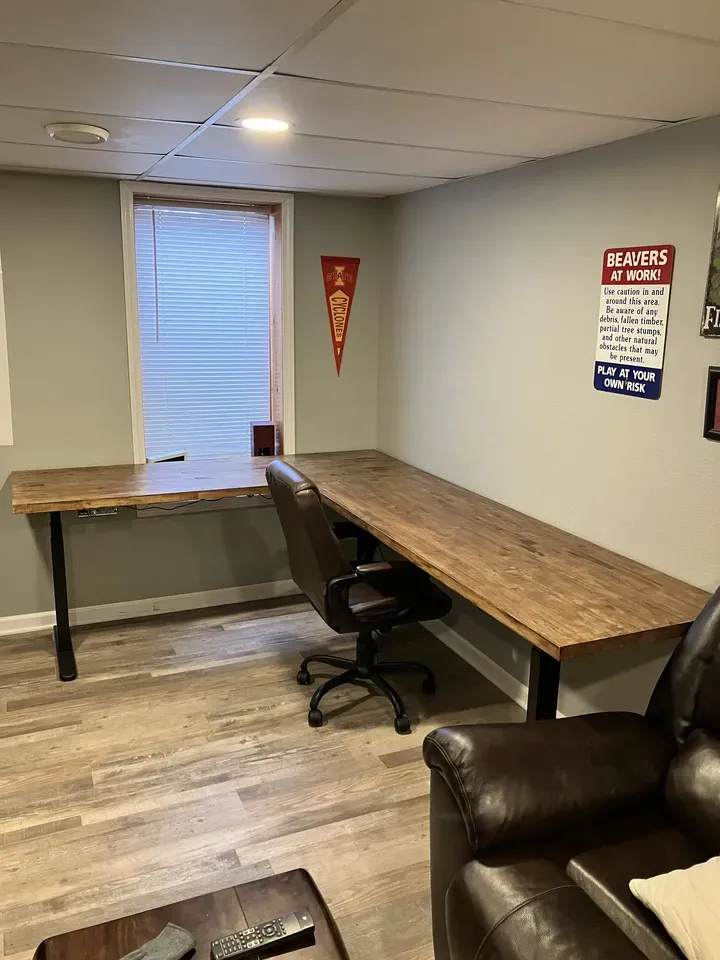
For as long as I can remember, I’ve never been particularly proud or excited about my desk setup. My current setup is a cheap 25" x 50" IKEA desk that is neither personalized nor very functional. It’s made of a cheap-feeling cardboard-like material, lacks adequate space, and causes frustration from time to time.
As I was thinking about these problems, I remembered an epic scene from Ricky Gervais and Stephen Merchant’s American adaptation of “The Office”. Jim and Dwight were battling out who could build the most epic desk. Mega desk and quad desk were true masterpieces of commedy.
To quote Dwight on the feeling he had when using mega desk:
“All I care about is megadesk, that is all I care about; getting… more… megadesk”
If Dwight was so passionate about mega desk, and Jim went on to build a mega desk of his own to thwart Dwight, maybe there was something to this whole mega desk idea. It was time for me to build my very own mega desk.
Brainstorming
When setting out to build mega desk, I didn’t really know where to start. The options seemed endless. What color? Standing or sitting? Do you go with an L or U shape? What about drawers? To gain some traction, I thought it’d be a good experiment to walk through some of reasons I wasn’t a fan of my existing setup.
- The desk felt cheap.
- There was never enough space for projects.
- Sitting for a while was uncomfortable.
- The color didn’t match the space.
So for this project to be a success I would need to focus on fixing these pain points. I would need to set out to:
- Use better material (maybe a hardwood or metalic material).
- Build a bigger desk.
- Incorporate a desk frame with a standing option.
- Use material or paint to match the space.
With this brainstorm session in mind, I wondered what other people who built their own desk had experienced. Luckily, I’ve got a great tech friend group that is always willing to jam on ideas. I posed a simple question on our Discord server.

Advice came in hot! A common thread was to utilize butcher block as the top and to purchase a lift frame to pair with the hardwood. With that information, I was off to the races!
The Game Plan
With a solid collection of research under my belt, it was time to craft the build of materials. I needed to source a standing desk frame in an L shape, two butcher block slabs of various length for the top, and some stain/finish to coat the material.
A Note on Impatience
The most challenging part of the build was sourcing the materials to meet the deadline. I ordered the standing desk frame from Amazon and, once it arrived, I had 2 days remaining to make the desk a reality. Sourcing the perfect sized butcher block in that time frame turned out to be more challenging than I originally suspected. Lowe’s, Home Depot, and IKEA all have great selections. There were also a few local places in Des Moines that also had a decent variety. From my measurements of my existing space, the perfect size desk would be comprised of two 25" width by 60" length butcher block slabs. Sadly, I would have had to wait another week for this material to be delivered. Instead, I settled for taking the impatient route. This meant purchasing the 25" width by 72" long butcher block slabs. This made total length of the main desk 25 + 72 = 97 inches long: MEGA DESK!
The Materials
Here is the list of the final BOM I purchased:
- A Vivo L shaped standing desk frame
- A couple 72"L x 25"W x 1.5"T Aspen + Roth Hevea Butcher Block slabs
- Oil-based wood stain
- Oil-based finish
- Foam paint brushes
Execution
Once I had the list of materials the build was suprisingly straightforward. The standing desk came with super clear assembly instructions, including going about drilling pilot holes for screws, how/where to add brace plates, and how to lay out the electrical components.
I followed the following loose steps:
- Get the butcher block into the correct possition. This meant aligning the desk upside down and inverted from it’s final location. This step was pretty important as the desk is pretty heavy, especially after mounting the frame.
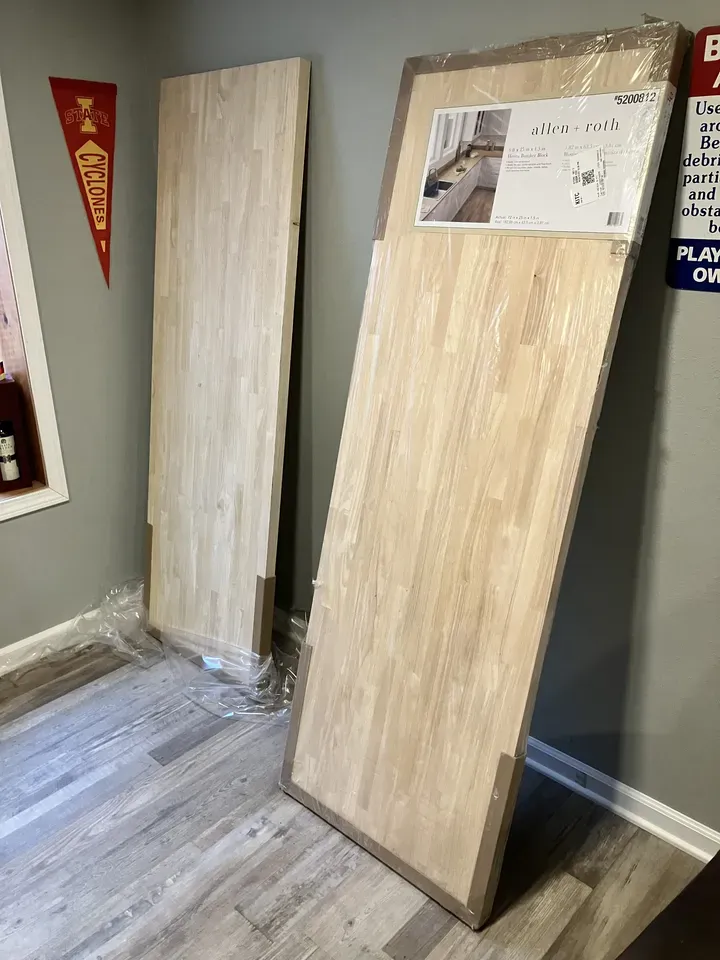
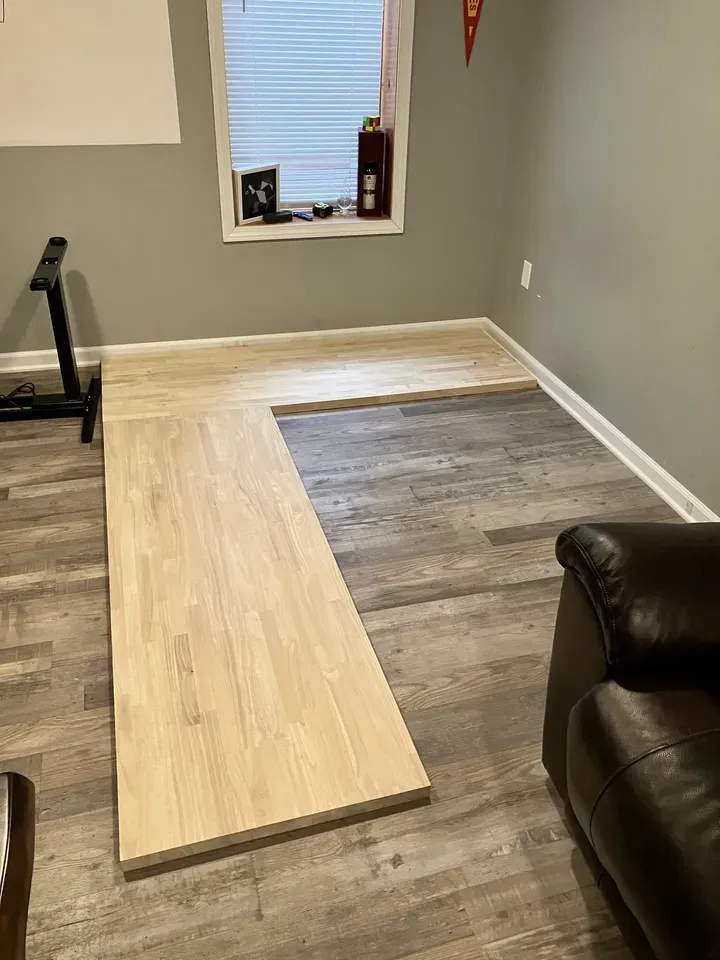
- The next step was positioning the standing desk frame on top of the desk. There was some eyeballing on the best place for the extension leg, but I used a tape measure to ensure it was aligned in the center.
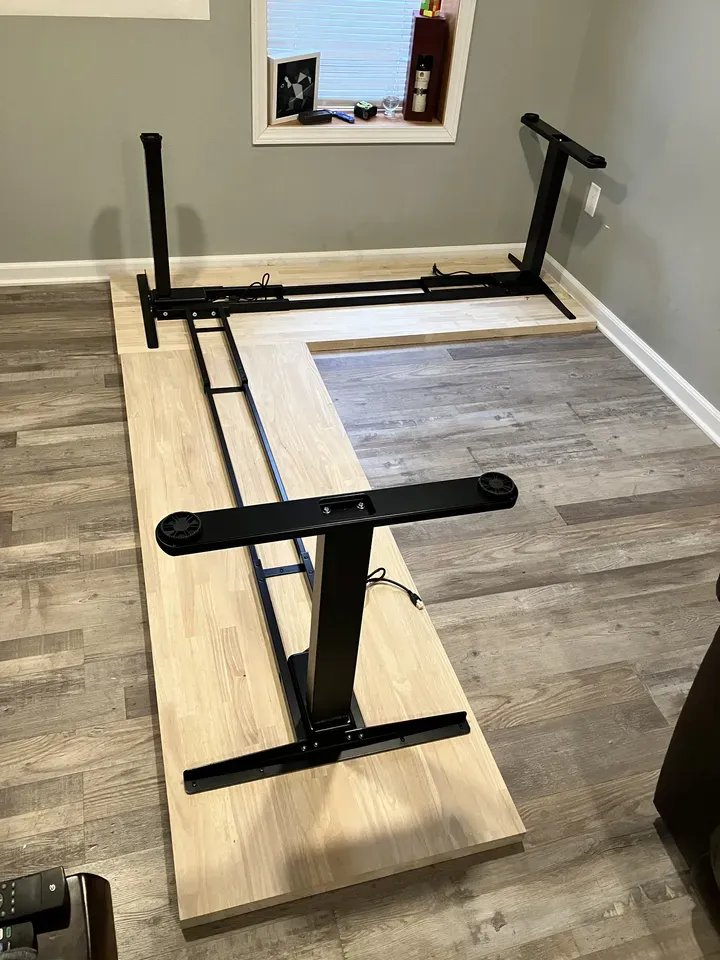
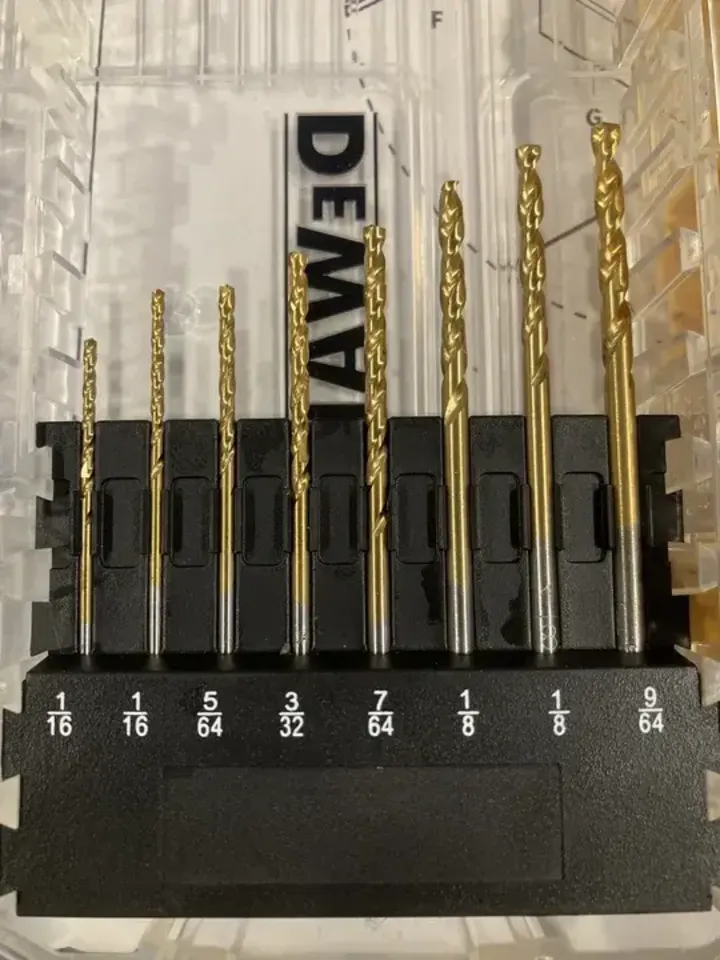
- After the frame was in place, it was time to drill some pilot holes. I used a 1/8" drill bit for this job. A pro tip was to plug in all the electronic components prior to drilling pilot holes to ensure the cabeling could reach prior to mounting.
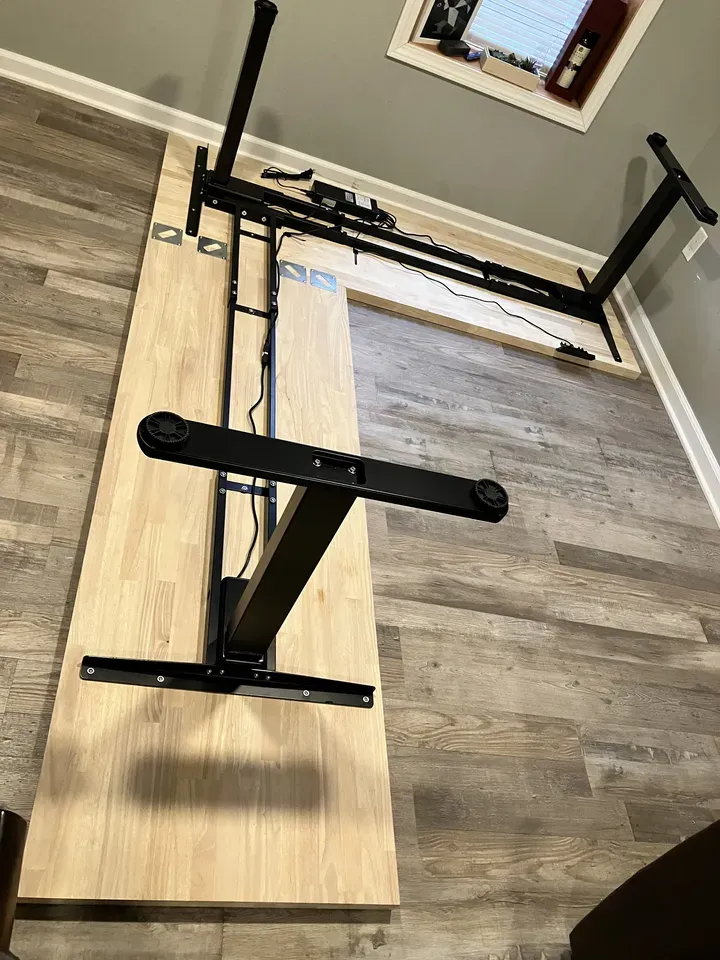
- With the pilot holes drilled, it was time to screw in the frame and the electronic components into the desk. This step also included mounting the silver brace plates where the two pieces of butcher block meet for extra support.
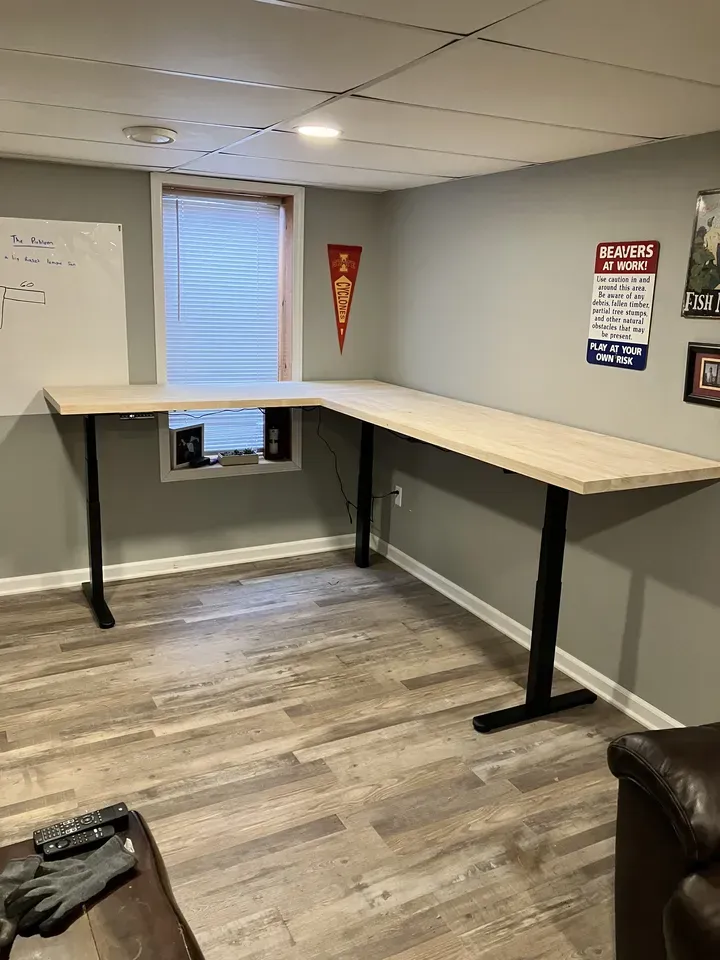
- Flipping the desk over and into position was by far the hardest part. For a desk this size it required a minimum of two people. Luckily my wifey Megan came in clutch here!
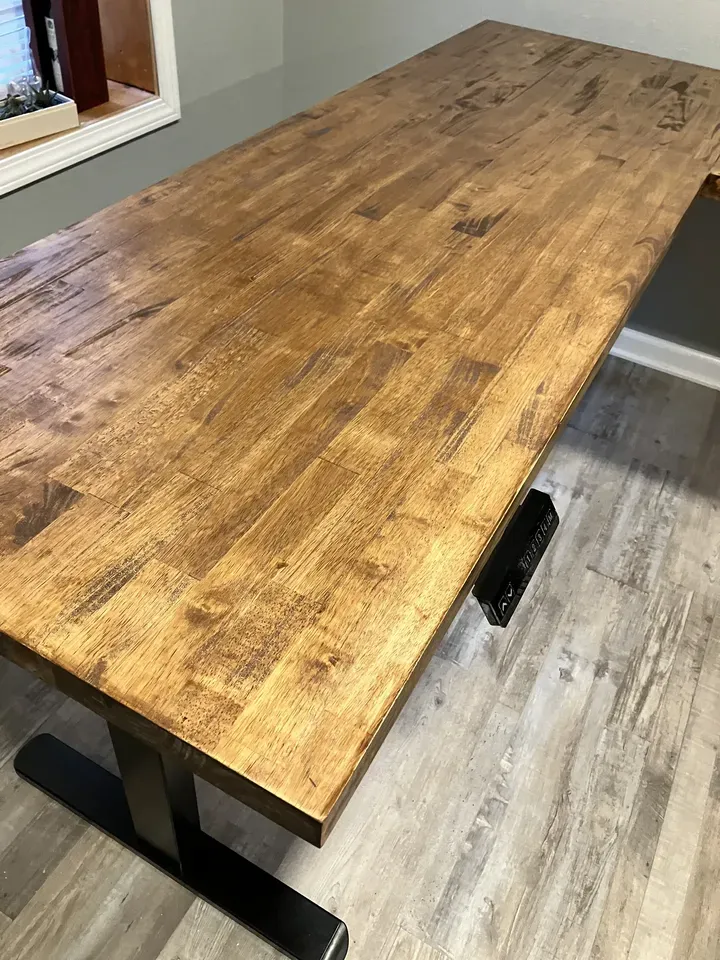
- Staining and finishing the desk came next. I only applied one coat of stain and one coat of finish with a few hours in-between for the stain to dry. Note to self: crack a window next time to avoid your room smelling like chemicals. For future builds, staining and finishing might be the first step of the build but I was happy with this method. Side note: I did not stain and finish the bottom of the desk out of laziness (but let’s keep that between us).
The Final Product
Now to be honest, I’m currently traveling at 522 mph, 32,000 feet over the Pacific Ocean on a flight to Kauai, Hawaii while writing this. So with that said, I’ve yet to actually utilize the desk… I haven’t setup my monitors, networking gear, or my computer vision hardware. With that being said, while sitting at the desk, I couldn’t help but feel proud of how the project turned out. The material looks and feels great. The standing desk functionality works perfectly. There is also more space than I know what to do with (although ask me in a month if this is still the case). Cheers to building new things!
